Adjusting to Your New Wix Blog after Being Used to WordPress
- Aug 3, 2016
- 4 min read

You're gonna love your Wix blog, I'm 99% certain. But there will be a bit of a learning curve in getting used to its quirks, especially if all you have been used to is the WordPress platform. So here is what you need to know to ease into a comfortable and efficient level of familiarity with the Wix tools.
1. How to Open the Blog Manager
Whether uploading content to your blog, or composing content in the blog editor requires opening your blog manager. You can do this quickly from your account dashboard. Just click on the square marked Blog right next to the thumbnail of your website. This bypasses opening the editor for the whole site, and just goes quickly and directly to the blog. We love that!
But if you are already working elsewhere on your website and now want to get to the blog manager, first navigate to the main blog page by clicking on the word Blog in the drop down list of pages. Then click anywhere on an existing blog post to get the little toolbar that looks like this:

When you see this toolbar, click on the Manage Posts button to find a previously written post you want to edit, or click on Add New Post to go right to a blank post area ready for you to upload what you have written or where you can start to write.
2. What the Other Toolbar Icons Do
From that same first toolbar, you can do a few more things, like change the number of words shown in the blog "abstract", change the size of the Read More button, change the display layout of your blog, and change the colors of the title and the blog border, and so on.
I recommend poking around on this icons so you can get familiar with where to go when you want to make a change to how your top blog page looks.
3. What You Can Do in the Blog Manager
The blog manager, pictured below, holds the list of all blog posts you've entered, with the most recent on top. When you have tons of posts on your site, you can sort through them more quickly by searching via the tags link on the top line in the middle.
When you want to finish writing a blog you have started and saved as a draft, hover over its listing to make visible some icons and the Edit button in the right side column for that listing under the designation of Draft or Published. If you move your mouse down the list of blog posts, you'll see that those icons and buttons are available for each individual post as long as you are hovering over one.

4. Tools in the Individual Blog Post
Here's where the good stuff is. When you are working in an individual blog post, there are more tools available to you, and several of them are really important for SEO. But first, let me tell you how to find the basic text editing tools that should look relatively familiar to you from your use of WordPress or Microsoft Word. These tools are invisible until you have highlighted some text, and then the expandable tool bar will open.
Here's what that looks like, using the paragraph above:

Where it says default in the text toolbar is where you can change the font style. Click on the word More on the right end to add bullet points or change the spacing between lines of text, and other refinements.
5. Linking to Related Blog Posts or Pages of Your Website
In the photo above you can see the link icon next to the word More. The process for linking anything in your blog is to:
first add the text to link from
highlight the text
click the link icon in the text toolbar
add the website url for the page you want to link to, or.....
add the page or anchor on your own website you want to link to
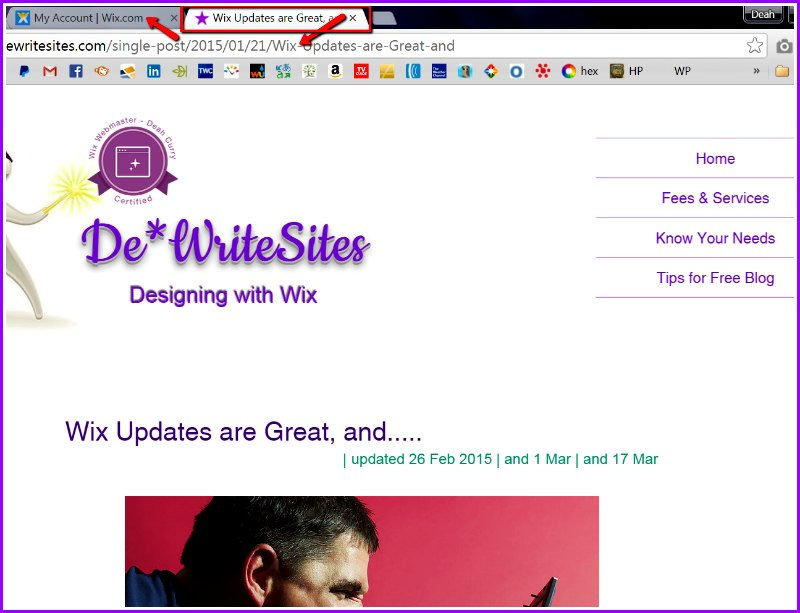
If you are adding related blog post links, I find it best to have a separate public view browser tab open to the desired post. Then it is easy to copy the url for that post from the browser, and come back to this blog editing screen to paste in as the website url link (not the page link). Hope that makes sense. Let me know if I need to word it differently.
If you will have more than one related blog post title to link to per new post, I'd suggest having separate browser tabs open for each one before starting the linking, to expedite the process.
Here's what it looks like on my screen when I do it. Notice that I have the Wix editing tab open on the left, and the public view of my blog open on the right (boxed in red below). Capture the whole url from the browser bar,

where shown by the arrow above, then click over to the Wix editor tab to complete the copy and paste procedure for linking.
Related Blogs


Comments